Craftsmanship period - 3rd grade
Design of a lesson plan booklet at a Waldorf school in the 3rd grade. Design: Andrea Reiß

The finished period booklet illustration of a potter.
Step 1

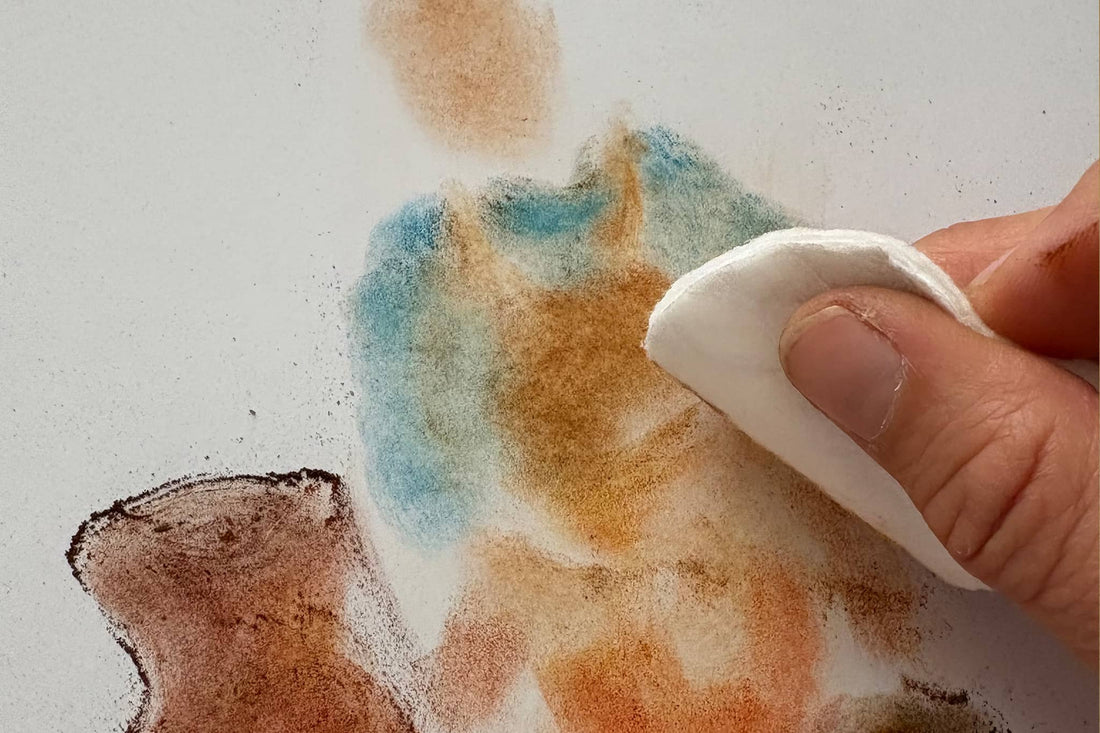
In the first step, we carefully rub the colored powder off the color sticks using the rubbing block and roughly place it where the potter is to be created. We use shades of blue and brown. This creates loose islands of color, which are later rubbed into the painting surface with the fingers.
Step 2

Now the colored powder is rubbed into the painting surface. We work larger areas with our fingers – this creates soft transitions and even color coverage. For smaller areas and fine details, we use a cotton swab.
Step 3

Now we'll prepare the pottery vessels. In this example, we'll use shades of brown and gray, which can be created by mixing primary colors such as dark yellow, light red, and light blue (= brown) or light red and dark blue (= gray). You can pre-mix the colors on a separate sheet of paper.
Step 4

By deliberately varying the color tones and the amount of powder used, a three-dimensional effect is created – the objects appear spatial and gain depth. Excess colored powder is gently brushed from the image onto an enclosed sheet of paper using a cotton pad, and the colored areas are then polished to a smudge-proof finish.
Step 5

Fine details can now be carefully added directly using the colored sticks – for example, facial features, hair or contours. Tip: If you rub the color sticks at an angle on the rubbing block, a sharper edge is created – ideal for more precise lines and outlines.
Step 6

Finally, a warm background can be added – for example, with yellow and ochre tones – to frame the motif harmoniously. The eraser stick can then be used to bring out further fine contours, light reflections, or details. This brings the image to life and gives it depth and expression.
Step 7
The result is an atmospheric picture of a potter at work.
1 comment
Absolutely love using this product busy making Xmas cards right now xx